
- English
- Español
- Português
- русский
- Français
- 日本語
- Deutsch
- tiếng Việt
- Italiano
- Nederlands
- ภาษาไทย
- Polski
- 한국어
- Svenska
- magyar
- Malay
- বাংলা ভাষার
- Dansk
- Suomi
- हिन्दी
- Pilipino
- Türkçe
- Gaeilge
- العربية
- Indonesia
- Norsk
- تمل
- český
- ελληνικά
- український
- Javanese
- فارسی
- தமிழ்
- తెలుగు
- नेपाली
- Burmese
- български
- ລາວ
- Latine
- Қазақша
- Euskal
- Azərbaycan
- Slovenský jazyk
- Македонски
- Lietuvos
- Eesti Keel
- Română
- Slovenski
- मराठी
- Srpski језик

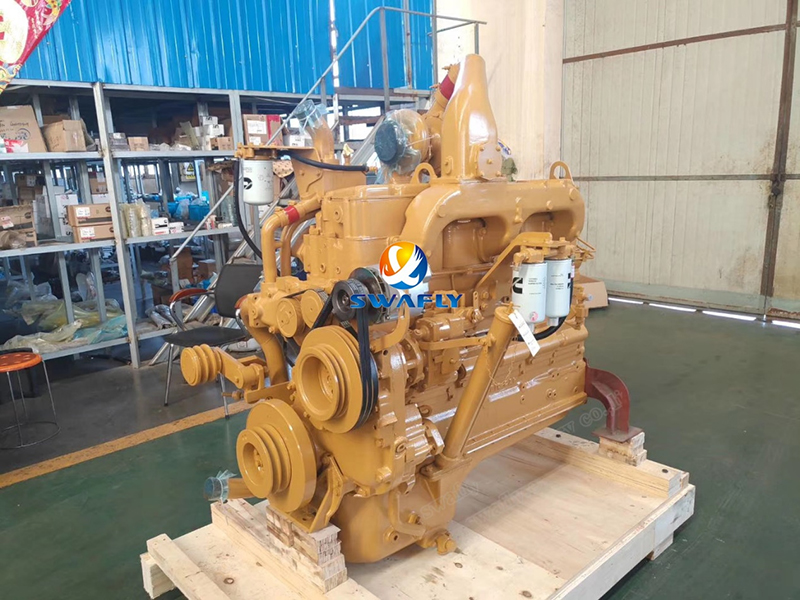
A Practical Guide to Assembling the Cummins NT855 Engine
The Cummins NT855 engine has earned its reputation for reliability and performance through precision engineering and careful assembly. Getting the assembly process right is what brings this powerhorse to life. Let's walk through the key steps that transform precisely machined components into a fully functional engine.
Building the Foundation: Cylinder Block Assembly
Think of the cylinder block as the engine's backbone. Every other component relies on its structural integrity.
· Initial Inspection: Before anything else, carefully check all oil passages for cleanliness. Any debris left behind can cause serious damage later. Also verify that all core plugs are properly seated.
· Plug Installation: Different sized pipe plugs require specific torque values:
| Plug Size | Torque (ft.lb) | Torque (N.m) |
| 1/8 | 10 - 13 | 13.5 - 20 |
| 3/8 | 20 - 25 | 27 - 34 |
| 1/2 | 35 - 40 | 47 - 54 |
| 3/4 | 50 - 55 | 68 - 74.5 |
| 7/8 | 60 - 70 | 81 - 95 |
· Key Point: Never use Teflon tape on plugs going into main or auxiliary oil galleries - use sealant instead. For cup plugs, apply a generous amount of Loctite sealant.
The Heart of the Matter: Crankshaft and Main Bearings
This is where precision becomes critical. The crankshaft converts piston motion into rotational force, and its bearings must be perfect.
· Preparation: Cleanliness is non-negotiable. Wipe main bearing bores thoroughly and ensure bolts are clean and dry. Remember: upper shells have oil holes, lower shells don't. N-series engines use three different bearing types across the seven positions.
· Assembly Process: Lightly oil upper bearing shells before installation. When handling the 7th main bearing, don't forget the locating ring. Install thrust washers with the grooved side facing the crankshaft. Apply clean oil to journals and lower shells, then carefully position bearing caps according to their numbered locations.
· Torque Sequence: Follow this multi-step process:
1. Tighten to 85 ft.lb (115 N.m)
2. Advance to 250-260 ft.lb (339-352.5 N.m)
3. Loosen completely to relieve tension
4. Retighten to 85 ft.lb (115 N.m)
5. Final torque: 250-260 ft.lb (339-352.5 N.m)
· Clearance Check: New crankshaft end play should measure 0.007-0.018 inches (0.18-0.48 mm). For used crankshafts, don't exceed 0.022 inches (0.56 mm).
Sealing the Chambers: Cylinder Liner Installation
Proper liner installation ensures compression integrity and cooling efficiency.
· Inspection: Check for any sharp edges in liner bores that might damage O-rings. Surfaces must be clean and oil-free.
· Seal Placement: Install the rectangular ring in the upper groove (chamfer down), black O-ring in the middle, and red O-ring in the bottom groove. Important: Only lubricate O-rings right before installation, and complete assembly within 15 minutes after oiling.
· Critical Measurements: After applying sealant, you have 5 minutes to install liners. Check liner protrusion (0.003-0.006 inches) and bore out-of-roundness (max 0.003 inches in piston travel area).
Power Conversion: Piston and Rod Assembly
This is where linear motion becomes rotation - the essence of engine operation.
· Ring Installation: "TOP" marks face upward. Install oil ring first, being careful not to over-stretch rings. Stagger all ring gaps properly.
· Piston-Rod Marriage: Heat pistons to 210°C (98.9°F) for 15 minutes for pin installation. Never force pins with a hammer - if the piston cools below 70°C (21°F), you'll need to restart the heating process.
· Installation Tips: Align bearing tangs properly and ensure oil holes match. Lubricate everything generously before installation. Use a ring compressor and guide rods carefully onto the crankshaft.
· Rod Bolt Torque:
1. 70-75 in.lb (95-102 N.m)
2. 140-150 in.lb (190-203 N.m)
3. Loosen completely
4. 70-75 in.lb (95-102 N.m)
5. Final: 140-150 in.lb (190-203 N.m)
Valve Timing: Camshaft Installation
Precision here determines how well the engine breathes.
· Inspection: Check both camshaft and bushings for wear or damage.
· Key Alignment: Eccentric keys are engine-specific - don't mix them up. Install thrust plate with oil groove facing the gear.
· Timing Marks: Align the "0" marks on camshaft and crankshaft gears perfectly.
· Clearances: N-engines use shims for end play adjustment; K-engines have preset thrust plates.
Supporting Systems: Completing the Assembly
The remaining components bring everything together into a complete engine:
· Gear Housing: Check bushings and seals. Torque 24 bolts to 45-55 ft.lb (61-74 N.m)
· Rear Seal: Avoid lubricating the seal itself. Torque 8 bolts to 30-35 ft.lb (41-47 N.m)
· Oil Pan: 36 bolts total with different thread types. Torque: 35-40 ft.lb (47-54 N.m)
· Water Pump: 6 bolts (2 long, 4 short) at 30-35 ft.lb (41-47 N.m)
· Oil Pump: Lubricate O-ring before installation. 5 bolts at 35-45 ft.lb (47-61 N.m)
Final Integration: Major Components
· Accessory Drive: Calibrate PT pump beforehand. Stagger gear timing to prevent air competition between compressor and engine.
· Vibration Damper: Check for leaks by heating to 75°C. Cross-tighten six 7/8-inch bolts to 175-205 ft.lb (190-217 N.m)
· Cylinder Heads: Pressure test before installation. Follow the three-stage torque sequence:
1. 20-25 ft.lb (27-34 N.m)
2. 80-100 ft.lb (108-136 N.m)
3. Final: 265-305 ft.lb (359-413.5 N.m)
Fine-Tuning: Injection Timing
Proper timing ensures efficient combustion:
· Set up dial indicators on piston and injection pushrods
· Follow the multi-step rotation procedure to account for gear backlash
· Final verification at BDC confirms correct timing
· Remember: N-engines use shims for timing adjustment, while K-series engines use different eccentric keys
Getting each of these steps right - with clean components, proper lubrication, correct torques, and precise alignments - is what makes an NT855 live up to its legendary reputation for durability and performance.